Before printing out your actual documents, you should run a quick test page to check your printer’s printing quality. You can send a command to your connected printer to print out a test page with predefined information, usually containing information about the printer itself, to see how the resultant page turns out. The test page will show you if there is anything wrong with the printer, such as low ink, leaks ink, or any other issue.
To print a test page on a printer connected with a Windows 7 PC, perform these steps:
-
Navigate to the following:
Control Panel >> Hardware and Sound >> Devices and Printers
Alternatively, you can also type in control printers in the Run Command box to open the Devices and Printers applet.
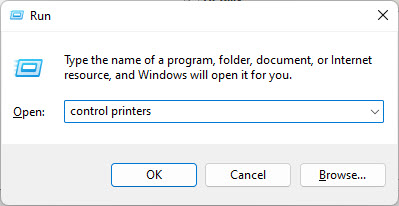
Open Devices and Printers -
Right-click on the printer you want to test and click Printer properties from the context menu.
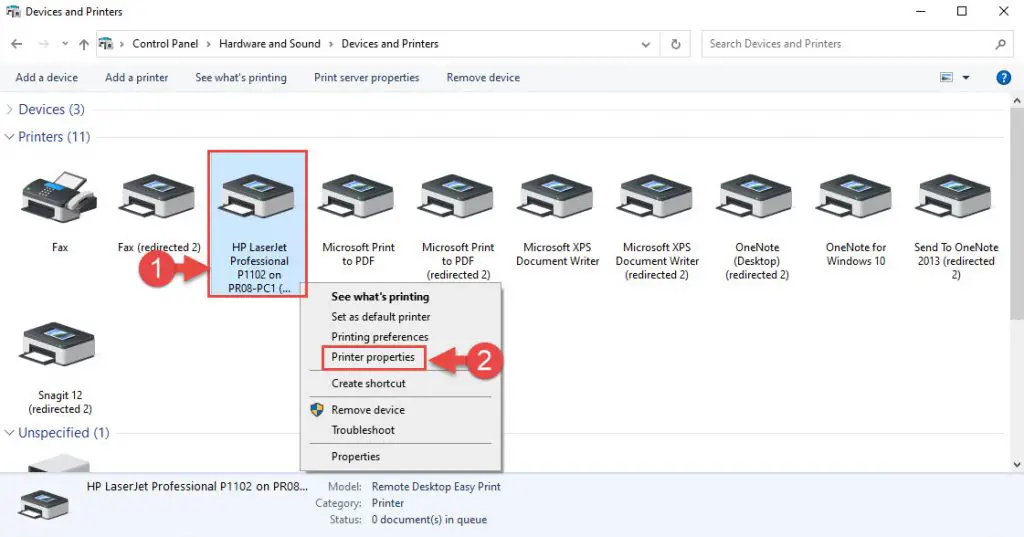
Open printer properties -
In the Properties window under the General tab, click Print Test Page to print out a test page.
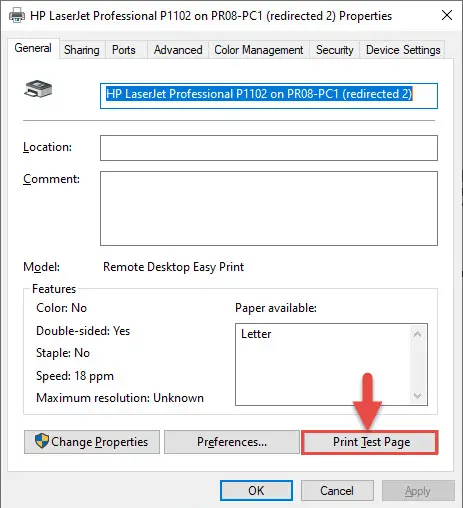
Print a test page
The printer should now print out a test page, using which you can determine its current state and troubleshoot it if required.

